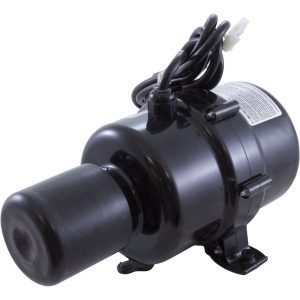
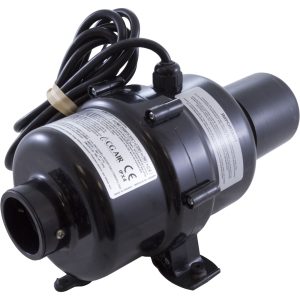
Blower, CG Air Millenium Eco, 230v, 2.8A, 8ft AMP, w/Muffler | ME-750-230/50-AMP
$100.95
2 in stock
CG Air Millennium Eco 230V – Premium Muffled Performance
Product Overview
As a retailer of hot tub parts, I’m featuring the 230V CG Air Millennium Eco with enhanced muffler system, representing the pinnacle of quiet operation and energy efficiency in the Millennium series. This model combines sophisticated noise reduction with superior power efficiency.
Key Features
Enhanced Sound Control
Beyond the standard 95% vibration reduction from rubber mounts, this model includes an additional muffler system for ultimate noise suppression.
Extended Connectivity
- Professional 8ft AMP cord (96″)
- 230V power efficiency
- Low 2.8A current draw
- Enhanced reach capability
- Secure 4-pin connection
Technical Specifications
| Specification | Detail |
|---|---|
| Model Number | ME-750-230/50-AMP |
| Voltage | 230V |
| Amperage | 2.8A |
| Cord Length | 8 feet |
| Connector Type | 4-pin AMP |
| Pipe Compatibility | 1″ to 2″ PVC |
| Vibration Reduction | 95% |
| Extra Features | Integrated Muffler |
| Size Profile | Compact |
| Control Options | Air/Electronic |
Installation Benefits
- Multi-size pipe compatibility (1″-2″ PVC)
- Extended cord reach
- Compact footprint
- Lightweight design
- Enhanced noise control
Performance Features
Power Efficiency
- Low-amperage 230V operation
- Optimized energy consumption
- Maintained high performance
- Efficient air delivery
- Reduced operating costs
Advanced Noise Management
- Dual noise reduction system
- Integrated muffler
- Rubber motor mounts
- Minimized operational sound
- Enhanced vibration control
- Superior acoustic performance
Applications
Ideal for:
- Premium spa installations
- Extended reach requirements
- Noise-sensitive environments
- Energy-conscious setups
- Professional applications
System Integration
- Wide control compatibility
- Memory function
- Extended 96″ cord
- 4-pin AMP connection
- Versatile control options
Design Advantages
- Professional muffler system
- Eco-friendly operation
- Compact construction
- Enhanced power delivery
- Superior noise control
Operational Benefits
Energy Efficiency
- Reduced power consumption
- Lower amperage draw
- Efficient 230V operation
- Optimized performance
- Long-term reliability
Installation Flexibility
- Extended cord length
- Multiple mounting options
- Universal pipe fitting
- Professional connections
- Easy maintenance access
Important Note
The specialized internal design requires manufacturer-specified replacement parts – standard air blower motors are not compatible.
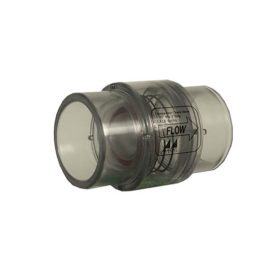
Check Valve, Air, Magic, 1/4lb, 1-1/2"S (2"Spg) Clear | $18.71 Max: 110 Min: 1 Step: 1 Add to cart | |
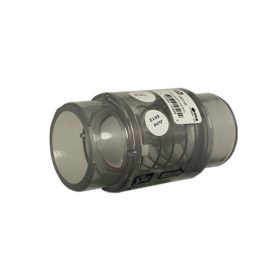
Check Valve, Air, Flo-Control, 1/4lb Spring, 1-1/2"S (2"Spg), Clear | $27.62 Max: 21 Min: 1 Step: 1 Add to cart | |
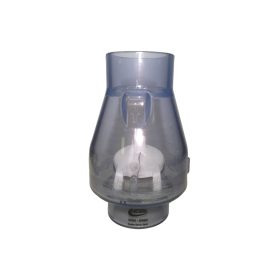
Check Valve, Valterra, Swing, 2" Slip x 2" Slip, Clear | $32.34 Max: 18 Min: 1 Step: 1 Add to cart |
Considerations when replacing a blower
When replacing a hot tub blower, there are a few important factors to consider. One of the most important considerations is ensuring that the voltage of the replacement blower matches the voltage of your hot tub’s electrical system. This is because using a blower with the wrong voltage can result in damage to the blower, the hot tub’s electrical system, or both. Check if the blower you are replacing is 230V or 120V – it makes a difference! While the power of the blower is not necessarily important, it’s a good idea to select a replacement blower that has a similar power rating to your existing blower. This will help ensure that the replacement blower is capable of producing the desired air pressure and flow rate in your hot tub. Another factor to consider when replacing a blower is the size of the blower’s outlet pipes. If the replacement blower has different pipe sizes than your existing blower, you may need to use adaptors or convertors to connect the blower to your hot tub’s plumbing. This is important to ensure that the blower is properly connected and doesn’t leak air. In summary, when replacing a hot tub blower, it’s important to match the voltage of the replacement blower to your hot tub’s electrical system and consider the power rating and pipe sizes of the replacement blower. By selecting a replacement blower that matches these criteria and ensuring that it’s properly installed, you can help ensure that your hot tub continues to provide a relaxing and enjoyable experience.Don’t forget the Check Valve!
A check valve is an important component to consider when installing a hot tub blower. A check valve is a one-way valve that allows water to flow in one direction only, preventing backflow. In a hot tub, the check valve is typically installed on the air line between the blower and the jets. This keeps the water out of your blower – last thing you want is water in your blower. There are a few reasons why a check valve is important when using a hot tub blower:- Prevents water from entering the blower: Without a check valve, water can backflow from the hot tub plumbing into the blower when the blower is turned off. This can cause damage to the blower and can also create a safety hazard if water comes into contact with the blower’s electrical components.
- Maintains air pressure: A check valve helps maintain the proper air pressure in the hot tub system. Without a check valve, air can escape from the hot tub jets when the blower is turned off, reducing the water pressure and the effectiveness of the massage feature.
- Reduces noise: A check valve can help reduce noise in the hot tub plumbing system. When the blower is turned off, water can flow backwards through the air line and create a gurgling or burping noise. A check valve prevents this noise from occurring.
Wiring a Hot Tub Blower
When wiring a hot tub blower, it’s important to not only follow the manufacturer’s instructions but also to check the pin out diagram on the spa pack. The pin out diagram will show you the location of the various terminals and connectors on the spa pack, which you’ll need to connect to the blower. Here are the steps to wire a hot tub blower while checking the pin out diagram on the spa pack:- Turn off the power to the hot tub at the circuit breaker.
- Locate the spa pack, which is usually located near the hot tub. Look for the pin out diagram, which should be located on the inside of the access panel.
- Determine the voltage requirements of the blower. Most hot tub blowers operate on 120 volts, but some may require 240 volts. Make sure you have the correct voltage before proceeding.
- Connect the blower to the control system. The blower should have a set of wires that connect to the spa pack. Match the wires from the blower to the corresponding terminals on the pin out diagram. Make sure to follow the manufacturer’s instructions for the proper wiring sequence.
- Connect the blower to the power source. The power source is usually a dedicated GFCI breaker or a GFCI outlet that is installed near the hot tub. Again, follow the manufacturer’s instructions and match the wires from the power source to the corresponding terminals on the pin out diagram.
- Test the blower to make sure it’s working properly. Turn on the power to the hot tub and activate the blower from the control panel. The blower should start up and produce the desired amount of air.
- Secure all wiring connections and close the access panel to the spa pack.
- Turn on the power to the hot tub at the circuit breaker.
| Brand | CG Air Systems |
|---|---|
| H Part# | 34-122-1028 |
| Blower Mount Type | Side Mount |
| Blower Voltage | 230v |
| Blower Amperage | 2.8A |
| Blower Model | Millenium |
Related products
Hydro-Quip Overlays
ACC Overlays
Sundance Topside Controls
Watkins Topside Controls
Balboa Topside Controls (Overlays)
Hydro-Quip Spa Controls
Hydro-Quip 6000 Series Spa Control Flow Thru Heater CS6200Y-U-WP

